Buy Yamaha Outboard Parts

Announcement

Collapse
No announcement yet.

Fuel Management Gauge

Collapse
X
 
  • Filter
  • Time
  • Show
Clear All
new posts

  • Fuel Management Gauge

    225hp Yamaha 2 stroke Pursuit.

    I did a search and did not see anything related to my problem.

    The gauge for the system is not reporting fuel usage. Sometimes it does work properly and sometimes it doesn't. Almost as if there is a loose or corroded connection somewhere.

    When it is not working, all it reads is all zeros as in the pic. The little icon in the lower left corner blinks continually, even when it works. Kinda wonder what that icon is also.


    As I stated, the problem is intermediate. When we left the dock yesterday it read all zeros up until the boat cut on the Jetties. Then it started reading gph usage and g. Then it went back to zeros. All while just cruising along. When it does start reading again, it starts from scratch. If it says I burned 5 gallons and then stops reading, once it starts again, they gallons starts over.

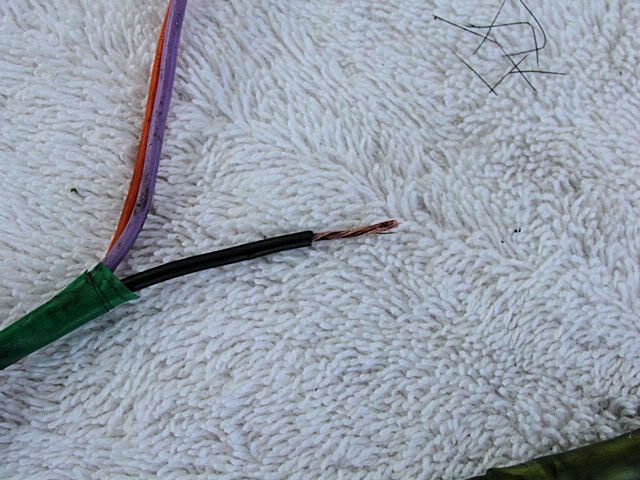
    I cannot find anything about it in my CLYMER shop manual. I was wondering where to start trouble shooting. Where do the wires go from the gauge? To the motor? To another area in the boat?

    Hopefully it is a loose or corroded connecting somewhere, since it does read all zeros instead of just going black. So the gauge itself is still getting power.

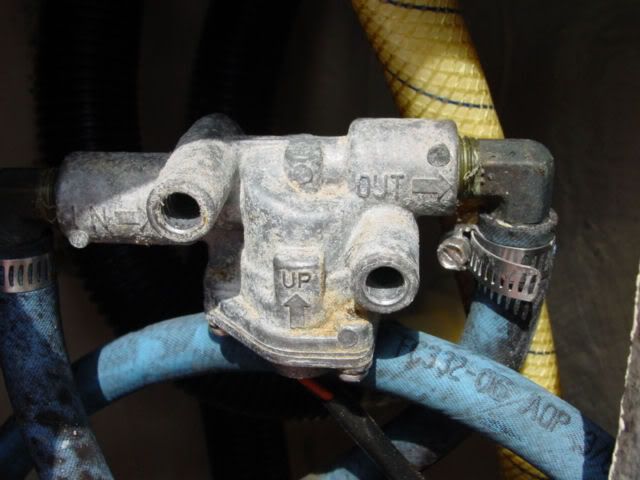
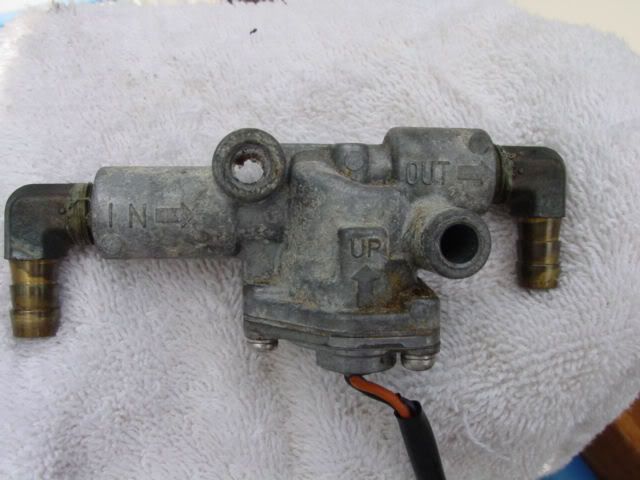
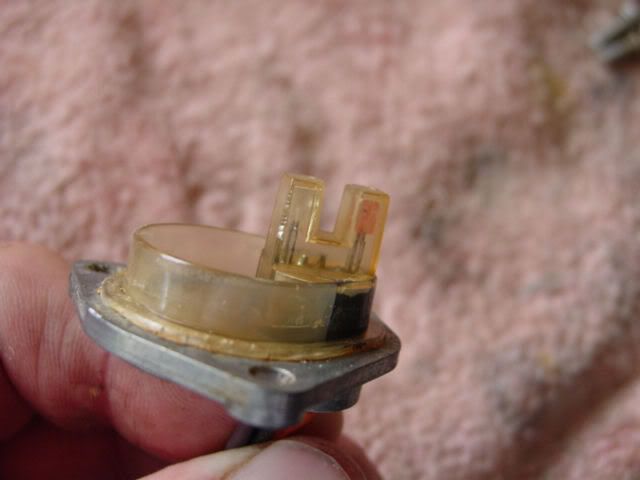
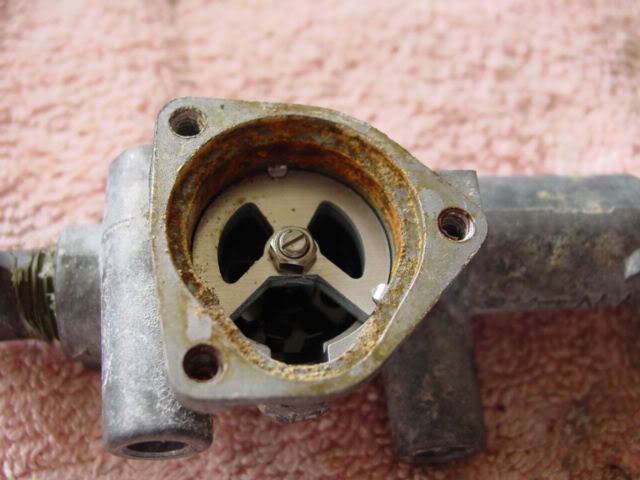
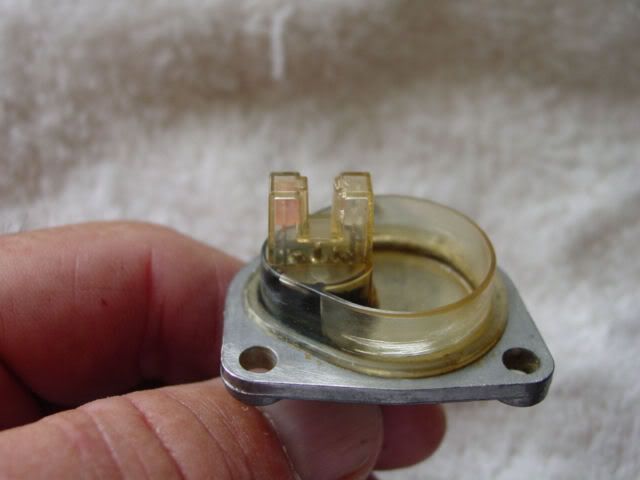
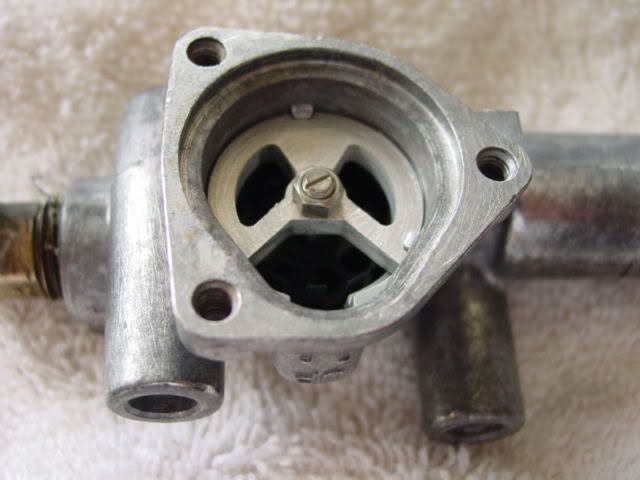
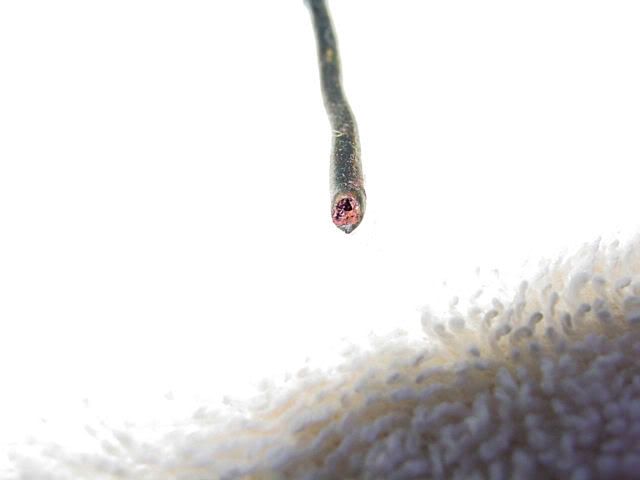
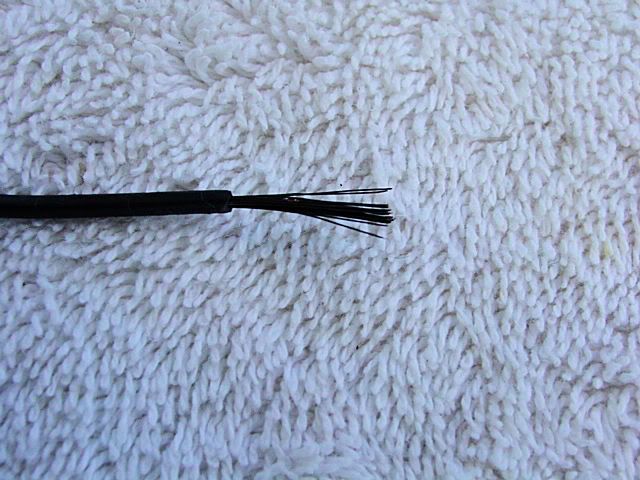
    First I opened up the back to get to this. I assume it checks the fuel flow and is part of the system.

  • #2
    Removed it to open and clean.


    Kinda dirty


    Likewise, though the little wheel inside it moved freely when I blew on it.


    Clean both pieces real good.

    Comment


    • #3


      Then I cleaned the connector to it with electrical cleaner.

      I then opened up the center console to check for the voltages like you said. Once opened, I started to check all connectors leaving the gauge and cleaning them also.

      I saw this one where the arrows are pointing. It was pulled out just enough to stay in place but not make contact. It looks to be a ground wire connector. Actually it was only held in place by the rubber.

      We went out after I did all this and it still read all zeros all day long. At least up until we were headed in and when we reached the jetties, it started to work fine again.

      I did see on the search I did some tips on checking out other things with it. So I will do them this morning and double check everything including voltage readings with my fluke meter.

      Comment


      • #4
        looks MUCH better now.... you MAY have had an air bubble in it causing a bad reading...

        Comment


        • #5
          I believe the Icon your asking about is your water separator warning indicator.

          Comment


          • #6
            Still not working and is about to drive me nuts. Someone told me to remove the wheel assembly from fuel lines, then blow through the input part and the gauge should start reading.

            I did this, heard the wheel spinning, but the gauge still reads all zeros.

            I also pulled the wiring from the wheel assembly through the hull to the center console and checked it for cuts, nicks or anything and it looked good.

            Now I am contemplating replacing the wires from the wheel assembly to the gauges first. Then move on to replacing the gauge.

            Or just go ahead and put it in the shop at this point.

            russfer, The ticking icon is a mystery to me as I have also been told it might be related to the hour meter. On the end of my wire harness to the assembly, I have two identical plugs, one plugs into the wheel assembly and other never has been plugged into anything. The one plugged into the assemble has green tape on it and the other red tape.

            Two more wires on it also, one is yellow with a black stripe and the other a ground. All of them were taped up together and when I twisted the wires around, the icon started flashing again. After awhile it stopped and I twisted them together again and it started flashing again.

            I think if I had a manual/instructions on all this, then I could most likely find the problem.

            EDIT: I'm now leaning with russfer on the icon. I read that the gauge comes with a Fuel contamination warning (when Deluxe Fuel/ Water Separator is used) .
            Last edited by FirePro911; 10-17-2010, 08:33 PM.

            Comment


            • #7
              Ok, I finally fixed it!

              I got to thinking about checking the harness before I replace it. So I used the Fluke meter set to Ohms (I think) to check to see if the harness wires were broken anywhere.


              I hooked one lead to the purple wire under the console and the other lead to the end connector right before the wheel assembly. It went from O/L to zeros and beeped, so that wire was good.

              I did this for the orange wire and it was good.

              The black (ground) turned out to be bad.


              In the above pic, you can see the part of the harness that plugs into the wheel assembly at the back of the boat. Top connector with the green tape is what is being used. The second harness with the red tape is for a second motor. The other wires are for the water fuel separator and is an option that is not being used on the boat.

              The ground wire coming off the top harness to the bottom connector turned out to be bad in a section right where it bends.

              I hooked one lead to the top connector and started probing the wire from the bottom connector back, until the Fluke went to zeros and started beeping.

              It ended up being right up past that bend in it. So I cut the wire there to discover the wire inside was powder as you can see in the below pic.


              So I then worked my way an inch at a time towards the to connector, stripping it each time until I got to good solid wire, which was still black and not copper looking.

              Comment


              • #8
                So I used Tarn-X to clean the wire back to being shiny.


                I then cut the wire about two inches right before the middle connector. Stripped it and cleaned it also. Then tested it from that point to under the console. It tested good.

                So I then connected both good ends together, testing the wire again from the top connector to the connector under the console, it tested good.

                Then spraying the new connection with Corrosion-X and then heat shrink tubing.

                Tested it one more time, and then taped it all up real good. I connected it back to the wheel assembly and blew through it, spinning the little wheel......nothing. Got to thinking, maybe the fuel triggers it to read.

                So I put the wheel assembly back where it belongs, checked all the connectors and fired up the motor and the gauge read finally.

                I then replaced the Mechanical to Electrical Conversion Capsule on the Fuel Sending unit along with a new gasket.

                That way, I now have fuel readings, from the assembly wheel, the speed gauge and the sight glass below.

                Comment


                • #9
                  good job, glad you didnt go and buy a new gauge

                  Comment


                  • #10
                    Yea, came close to buying the new cable online yesterday. Found it for 46 bucks.

                    But then the old brain kicked into second gear.

                    Comment


                    • #11
                      Nice

                      I love these type of posts. Excellent pictures, methodical troubleshooting and posted to completion. Wish I was that organized!

                      Comment


                      • #12
                        FirePro,
                        Not knowing anything about the 225 2 stroke because I run a F150. But the wiring for this gauge plugs into the fuel/water seperator on my engine and when it contains water that is when the icon is supposed to warn you that water is present. Then you just empty it, refill it with clean fuel and screw it back on and away you go.

                        Comment


                        • #13
                          Great post as I am about to try and trouble shoot my Gage. Twin f250s and neither reads. I just purchased the boat and it hasn't worked yet. Thank you for the detailed walk through.

                          Also the water indicator does nothing if it isn't connected. I saw mine flashing and changed out filters etc. Then found out that it isn't connected to anything. The individual tach gages for the motors have their own indicators.

                          Comment


                          • #14
                            Im reading zeros

                            Great detailed thread can you help me and if you can just tell me what wires to start on I can't reach the gauge and the sender unit wires at the same time

                            Comment


                            • #15
                              why are you posting on a 7 year old thread?

                              Comment

                              Working...
                              X